If you create a guest network with a Cisco Wireless Lan Controller, you will like to create and import a third-party SSL-Certificate for the Web Auth page. If you don’t add a third-party SSL certificate, your guest users will receive an error-message, that the WLC’s selfsigned certificate isn’t valid.
Cause i searched long time around, how to setup a third-party SSL certificate and it seems not to be the easiest thing, i wrote a Step-by-Step guide for integrating SSL-certificate to a Cisco WLC 5508 with Version 7.0.98.
Prerequisites
To create and import a third-party SSL-certificate you will need:
- an WLC 5508 with IOS Version 7.0.98 (i didn’t test it with other WLC’s or other versions, but maybee it will run the same way)
- an external Certificate Authority (CA). in this document i will use www.startssl.org, which offers free Class 1 certificates.
- a separated VLAN for the guest network with a DNS- and a DHCP-server.
- OpenSSL 0.9.8h for Windows
- a TFTP-server software (i use TFTP32)
Prepare the Wireless Lan Controller
Create the interfaces
You have to create two interfaces for the guest network. The first interface is like each other interfaces with a name, an IP-address and a VLAN-tag.
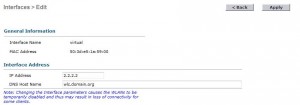
The second interface is a virtual interface. To create it, click to Controller tab and select Interfaces. Click to the New-button:
Set the IP Address and define the DNS Host name as it should be named in the certificate:
Create the WLAN
Now you have to define a separate WLAN (SSID) for your guests. Click to WLAN’s tab, select Create new and klick to Go.
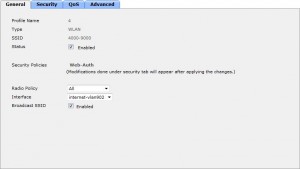
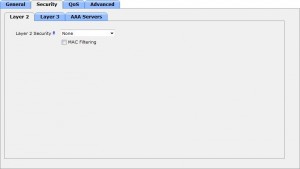
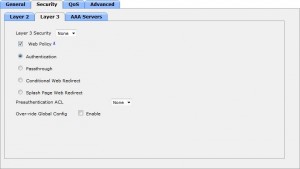 After set all other desired settings, click to Apply. If you scan now with your notebook for SSID’s the new one should be available withou any security. When you connect to it and browse to a webpage, you should receive a certificate error from a self signed SSL certificate.
Create a SSL certificate by startssl.org
Prerequisites
To create a SSL certificate with www.startssl.org, you have to register an user-account. By creating an user account, you will receive a user certificate, which you will need to logon securely to startssl.org.
To be sure, the requested domain belongs to you, you have to validate your domain. Cause we will use only the free Class 1 certificates, there isn’t any need for other validations.
Validate your domain
To create an Class 1 certificate for your host wlc.domain.org, you have to validate the domain domain.org at www.startssl.org. First you have to logon at www.startssl.org with your user certificate. After logon go to StartSSL PKI and then to the Control Panel.
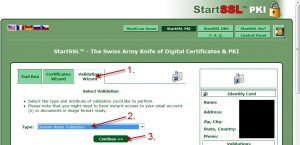
Go to Validation Wizard tab, select Domain Name Validation and click to Continue.
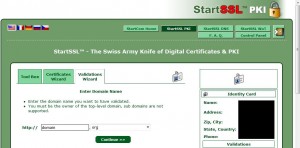 To validate that you are the domain owner, StartSSL sends an email to a predefined mail-address. Create one of the proposed email-addresses in your mail system and select it in the form:
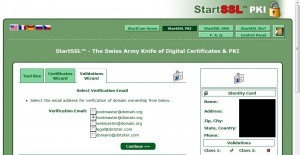 Click to Continue button and wait for the validation mail. As soon you received it, click to the validation link in this mail, to validate the domain.
Request the Certificate at StartSSL.org
Click to the Certificates Wizard tab, select Web Server SSL/TLS Certificate and click to Continue.
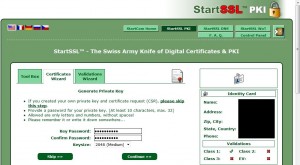
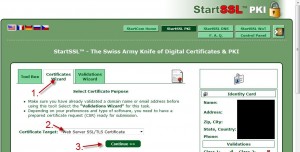 Enter a password (10 – 32 chars). Don’t forget this password, you will need it later and you can’t recover it. Select a keysize of 2048 bits (WLC doesn’t support more than 2048 bits and StartSSL doesn’t support less than 2048 bits):
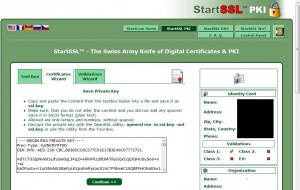 Copy the complete content from the textbox and paste it to a new text-file. Name the text-file private_key.txt. After creating the file, click to Continue.
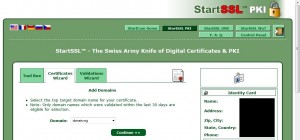
Select the desired domain and click to Continue:
Download the Device Certificate
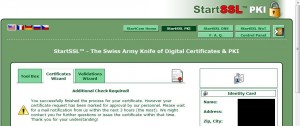
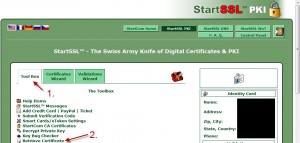
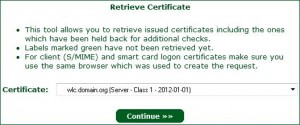
After the manual verification of StartSSL, you will receive a confirmation mail. Click to the Tool Box tab and select Retrieve Certificate:
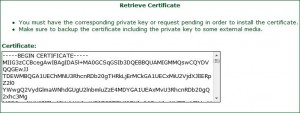 Copy the full content from the textbox and paste it to a new text file. Save the text file as device_cert.pem.
Download the CA certificates
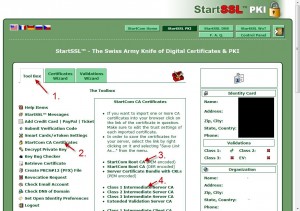
Click to the Tool Box tab and click to StartCom CA Certificates:
Combine the certificate
Create a new text file with the name All-Certs.pem and open it with a text editor. Insert the content of the following files in this order:
- Device certificate
- Class 1 Intermediate Server CA
- StartCom Root CA
Convert the certificate
To convert, you need openssl. i tested it with the Windows version 0.9.8h. Open a command prompt and run OpenSSL in it.
Run this two lines of code:
pkcs12 -export -in D:\All-Certs.pem -inkey D:\private_key.txt -out D:\All-certs.p12  -clcerts –passin pass:PASSWORD –passout pass:PASSWORD
pkcs12 -in D:\All-certs.p12 -out D:\final-cert.pem -passin pass:PASSWORD -passout pass:PASSWORD
Where D:\ means the path, where your certificates lies and PASSWORD means the password, you defined before on StartSSL homepage. Both lines should be executed without errors.
Import the certificate to the WLC
Now you can import the SSL certificate to the Wireless Lan Controller.
Run you TFTP-server tool and select the path where your certificates lies:
Open the Web Interface from the WLC again. Click to the Security tab and select Web Auth –> Certificate. Select the checkbox near Download SSL Certificate and enter the values like below:
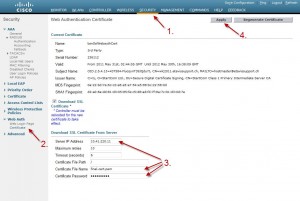 Click to the Apply button. After successfully downloading and installing the certificate, you need to reboot your WLC.
Additional needed network configurations
You have to configure your DHCP and DNS server in the guest vlan. At the DNS server you need to setup a zone entry for wlc.domain.org pointing to the IP address 2.2.2.2.

